Giving users access
About access in general
Granting users access can be done for any user in your organisation. This is true for all of the organizations assets (doors), but also for any assets belonging to other organizations that have been published to you. If you want to grant access to a user that is not a member of your organization, that person needs to either become a member, alternatively you can publish your assets to that persons own organization - if you choose to invite the user to your organisation, you can assign the user an access group directly with the invitation (help article on this coming soon).
There are two ways of giving a user access:
- by assets - in other words, grant access to a specific asset
- by an access group - an accessgroup can contain several different assets and access then be granted to all assets in the group (for instance "All office doors")
Granting access by assets

Read the article "Creating an asset for access" if you want to know more in-depth on how to create and manage assets.
Go to "Users" in the left menu and then click on the user in question. Then click "Add new" in the asset block:
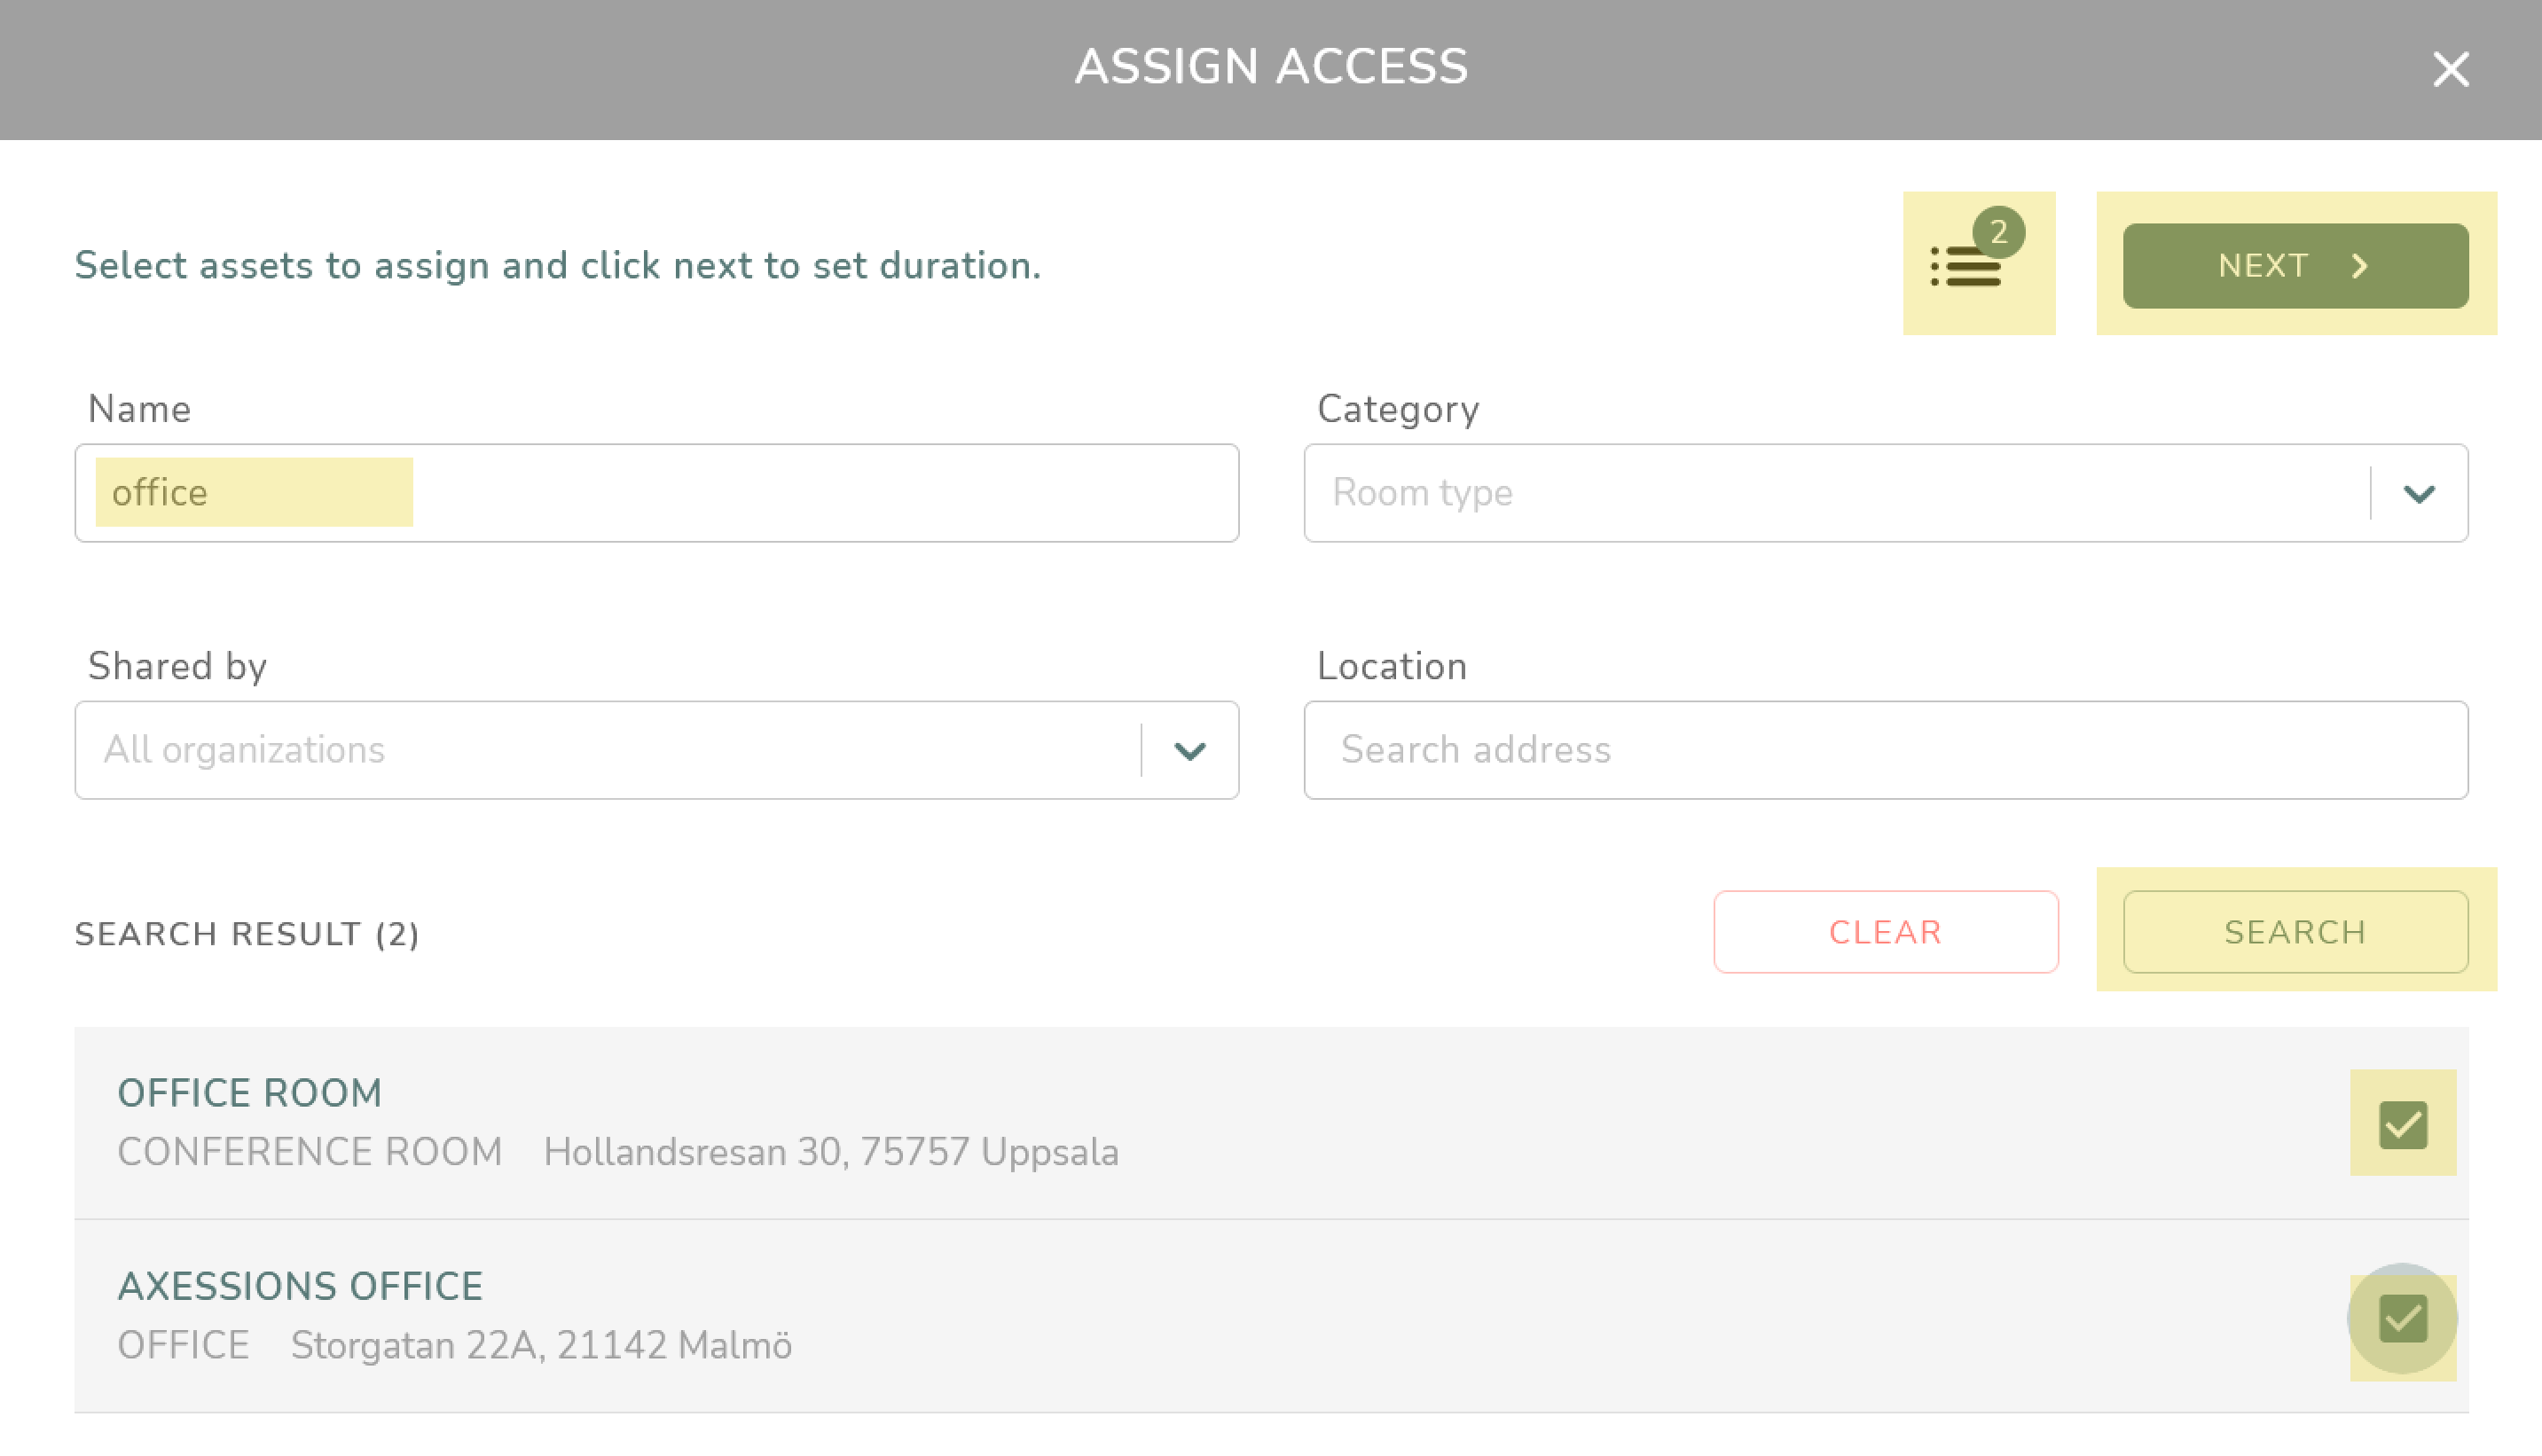
Search for the asset you wish to provde access to. When you check an asset it will show up in your "shopping cart" in the top right corner. Hence you can search and add more assets in one go. When you feel done, click "Next".

In the next window, you'll be able to set duration of the access. You can choose between either "Interval" or "Recurring":
- With "Interval", a starting date and an ending date will be set. Alternatively, duration can also be set to "until further notice" (i.e. no end date):
- If you select "Recurring", you can specify which recurring days the access should be valid on. You will also need to select an end date alternatively set the access to be valid on for the specified days "until further notice":
Granting access by access groups

Please read the article "Access groups" in case you want to read more in depth on how to create and manage access groups.
Click on "Access groups" in the left meny and then select the access group you wish to add and assign a member to. Then click "Add new" in the "Users" block:
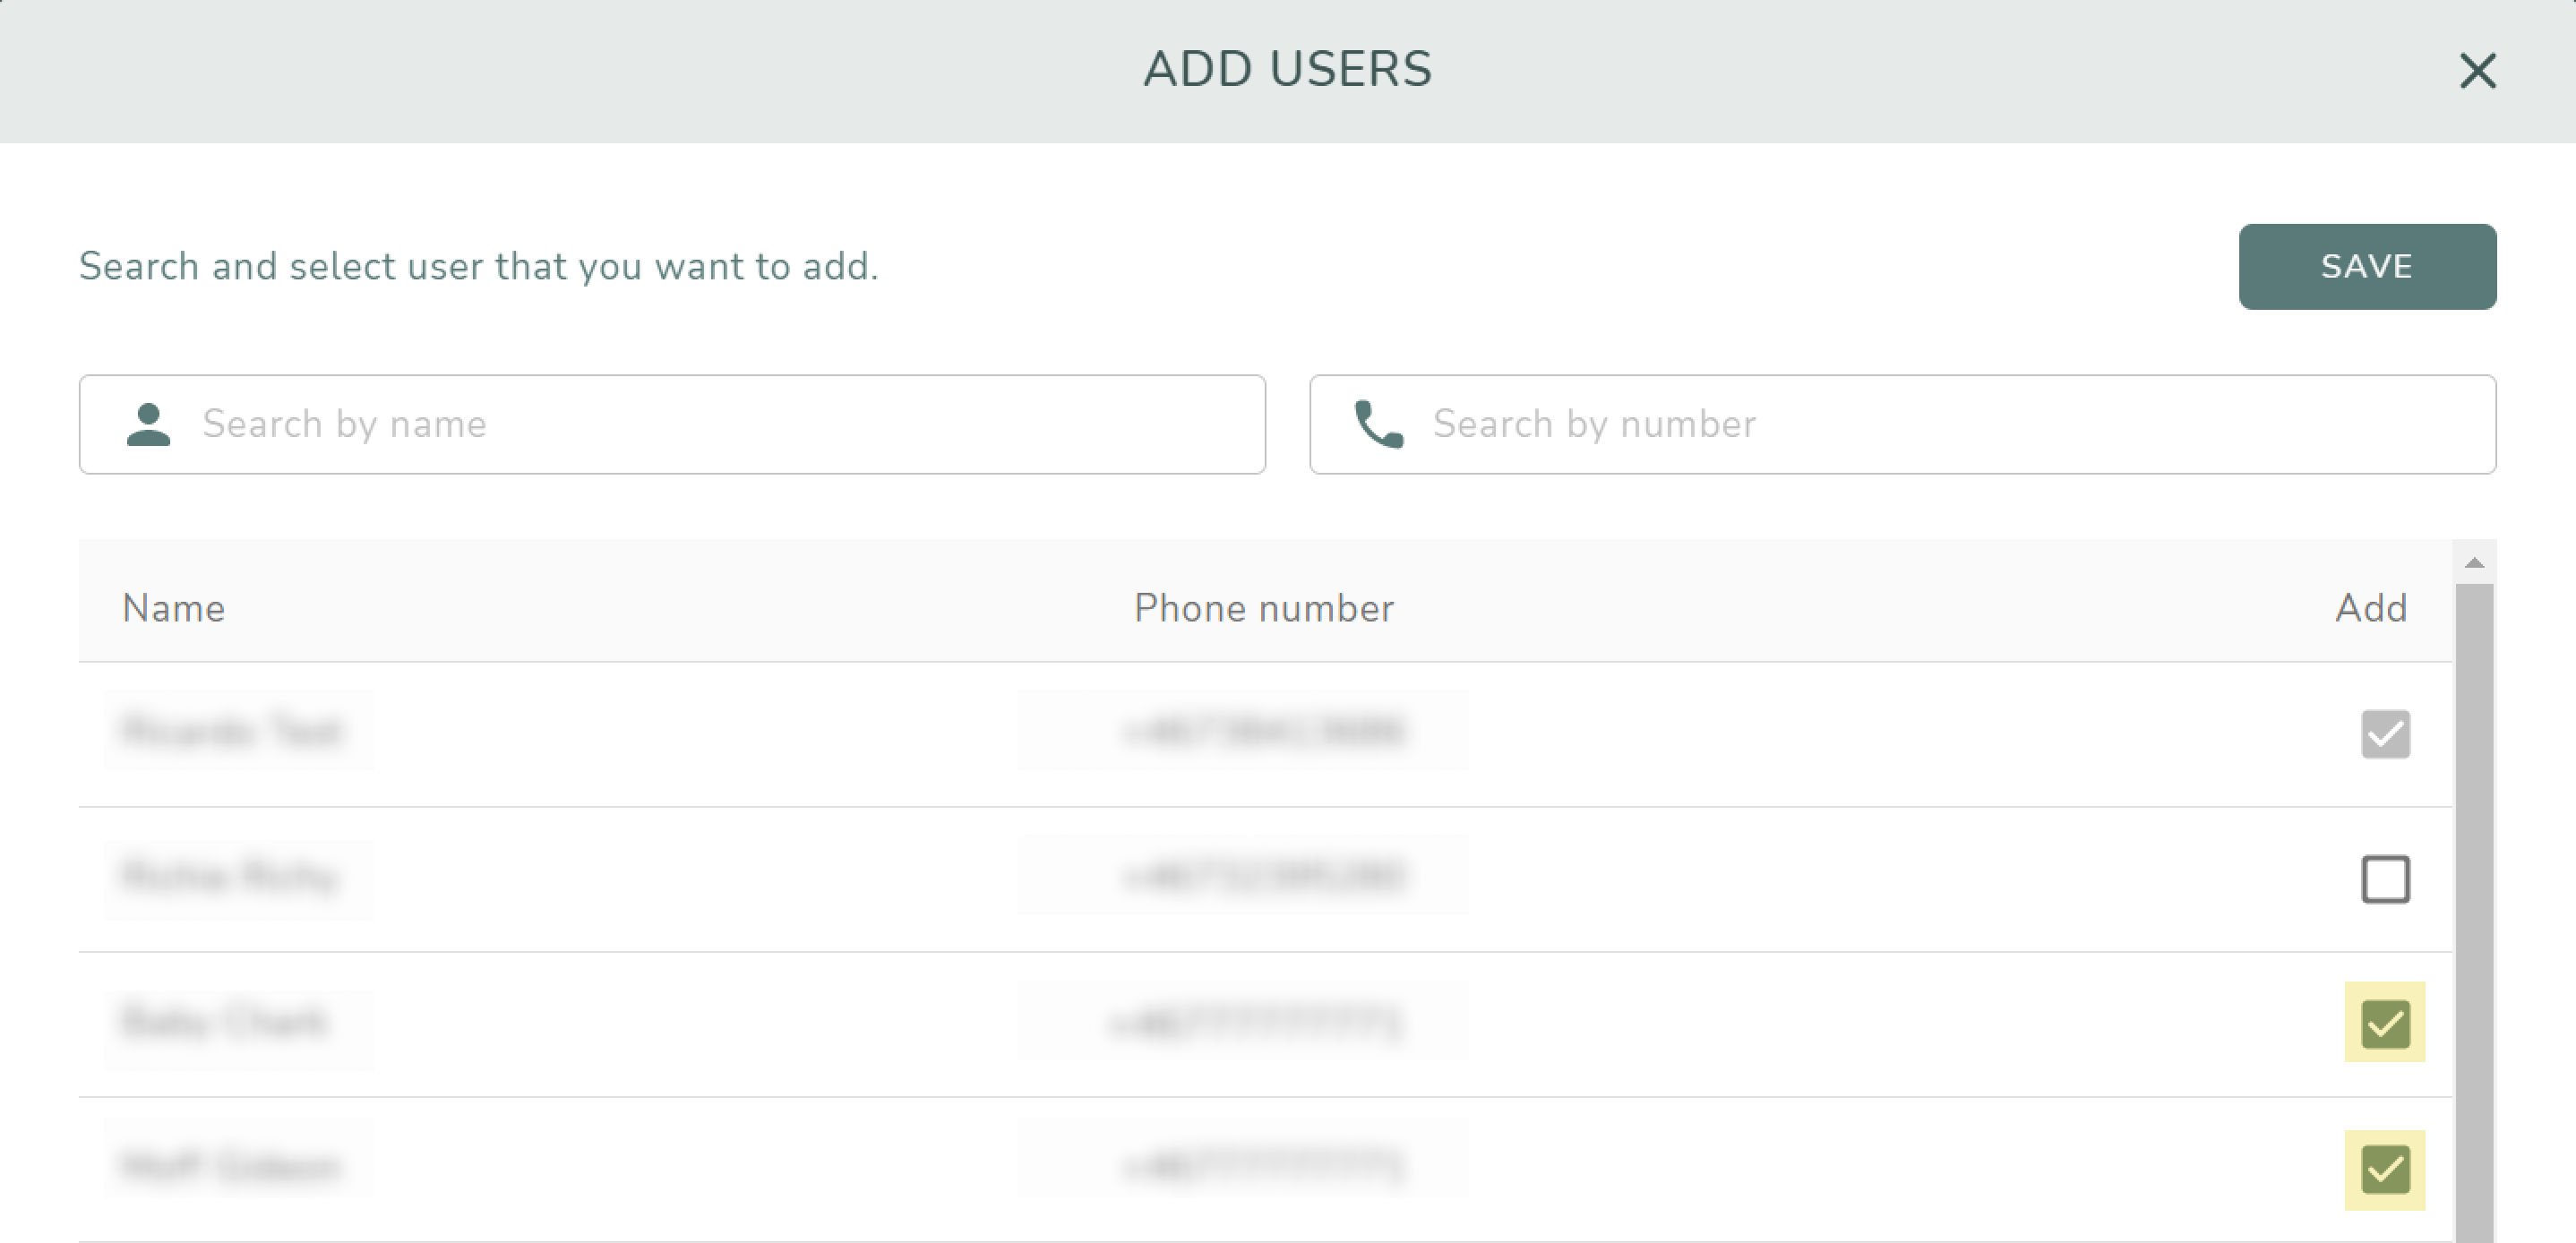
Now check the users you wish to add. Existing users in the group is already checked. Then simply click on "Save" to add the users to the group. The users will more or less immediately be able to use their new access on site.

Granting access to assets belonging to other organisations
A different organisation can give you the right to administer access to their assets (for instance, a landlord can publish an asset toa tenant who then can grant access to that asset themselves). This is done by them issuing a delegation trust to you while also publishing selected assets to you. Read more on this in the article about delegation trust.
See and edit a users access
Go to "Users" in the left meny and then click on a selected user. An overview of the users access will be presented.

Note that you can only the accesses for which you are a delegator.
As mentioned, a user can gain access either by an asset on by an access group. In the overview, these are represented by two different icons:
Here's an example of what it might look like:
If you click on the "three dots", you'll be presented some different options depending on if the access has been granted through an asset or an access group.
For personal access (i.e. by asset) the options are these:
|
For an access granted by an access group, the options will instead be these:
|

You can also see the duration of the access. Hover the mouse pointer over the icon to the left of the access name.
This is an example on how it might look like for an "Interval" duration:
And this is how it could look like for a "Recurring" duration:
Related Articles
Creating an asset and access
In order to be able to give a user access to specific assets, you first need to create that asset if it doesn't already exist. This asset can then be granted user access to. You can also publish assets to other organizations so that they themselves ...Access groups
In general about access groups An access group allows you to grant access to users for a collection of assets. In the most simple terms, an access group could for instance be a conference room (asset) for which one or more users are granted access ...Change name of an asset or access group
Change the name of an access In order to be able to change names of accesses and access groups you need to have the role "Asset administrator". Select "Asset" in the left menu and then click on the asset in question. Then click "Edit": You'll then ...Delegation trust
In general A delegation trust is something you can issue to another organization, giving them the right to administer access to your assets within their organization. For a delegation trust to be working properly, this is required: Issuing a ...Roles and adminstrators
In general Administrators in Accessy can have a few different roles. These will determine what options you will have in the left menu. These are the current roles available: Organization administrator - aimed at administering the setup of the ...